Sunday 28 December 2014

Are we mad?

Sometimes I feel that what we are trying to achieve is fantastic...and it will be...eventually. Now I know that we are still in the early days of building our place, however I have had that occasional feeling of fear and dread where I have thought...what on earth were we thinking! Why would we even attempt to build our own house out of a product that we don't know a great deal about. As we build, we are in fact becoming the experts.  When you have a very large role in building your house, and the buck stops with you then suddenly it becomes a little more foreboding.

Ok, every time I go and have a time of quiet contemplation (not happening much) and look at what we have done I am very excited and really..it is not that difficult. Yet everywhere I turn I see 'tricky bits' of wall that need a solution. The problem is that there is no one to call on to help us with finding solutions (if you are out there let us know), all solutions must come from us and the only way we will know if it works or not, is if it works!

The south wall has now had a couple of weeks to harden and I have to say I am very pleased and relieved that it has firmed up nicely and Grant even demonstrated this by punching the wall, crikey that was a scary second.

When you stand by the south wall and are surrounded by the hempcrete you feel as if you are in an entirely different micro climate. It feels great...
Building our house is a little like having a newborn baby..every day you are relieved as it gets stronger and the building keeps you loving it just enough so that you can't quite give it up.


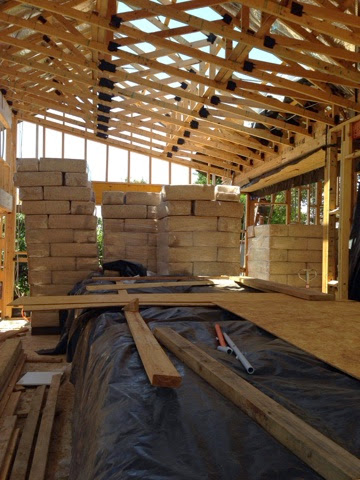
Working into the late afternoon. The shelter has been terrific in providing shade from the sun for the hemp mixer.

Thursday 18 December 2014

Tricky issues hempcreting around the frame


Ideally we should have 80mm minimum cover over the frame timbers. An earlier issue with the slab set out left the frame 50mm from the internal wall and 160mm from the outer wall instead of being in the centre. We have had to come up with ways of ensuring the hempcrete will stay in place with only 50mm cover.

For the regular studs, we have chosen to tamp the hempcrete tighter on the inside to increase the strength. However the triple studs at the door and window openings had us worried. The first approach we used was to staple some bamboo flower poles in a lattice up the stud. It was time consuming, especially without a power staple gun.

At the training workshop, reo chairs for supporting reo mesh were suggested. However, there are usually more than 50mm thick. A search of Google Images for similar products turned up reo "fastwheels". Packing the hempcrete around both sides of these discs will hopefully keep the hempcrete attached over these difficult spots.

The portal frame around the north facing windows are even wider, with only 80mm cover and the big LVL's are also a challenge. We will need to use this solution in those places as well and maybe think up some extra solutions as well.

Fastwheels around the triple stud


Jules installing formwork in the window frames


With so much hempcrete to mix and place, we needed to speed things up. Time to call in Nick and Jules. Half a day's work and most of the window and door frames are framed out with the left over brace boards delivered with the frames used for the vertical forms and particle board used for the headers.

I wondered whether the OSB would be too thin at 6mm. We may have to shape the opening a little, but I think it will help ensure a good airtight fit for the windows and doors.
A length of hempcrete wall, 2.4m high. This will be our very well
insulated pantry!

Friday 12 December 2014

Kevin McCloud thinks Hempcrete is pretty good

If it's good enough for Kevin McCloud to build his own eco-village out of 
hempcrete than it's good enough for us!


I keep hearing his voice in my head...the job we have taken does feel gargantuan. Maybe we are just a little mad.

Tuesday 9 December 2014

Preparing for the first proper mix

Last Thursday we started making hempcrete a little more seriously. We are using a product called Geoplast as our formwork.  The gap between the formwork is 300mm. The nail on the third picture is used a spacer. The nail also helps when adding the hempcrete to give you an idea of how much hemp had been added into the formwork.
Formwork laid out


Sam making up the hempcrete in the pan mixer

First load of hempcrete added

Wednesday 3 December 2014

The first hempcrete mix

If you'd asked me where the first mix would be placed, I can't imagine that I would have said under the box gutter. Luckily, I spent some time chatting to Wayne the plumber about our storm water layout, and he explained the sequence for installing the roofing and guttering. Turns out that the box gutter had to go in before the rest of the roof could be completed.

I had hoped Wayne would get the remainder of the roof on before the material was delivered, and the only weekend available beforehand was the weekend that I was also helping out on a Cub Scout camp. So the first mix was shaping up to be a rushed affair. It was Sunday lunch time before I could make a start.

As we didn't have any MgO board for the ceiling yet, I decided to install a temporary formwork to hold up the hempcrete. I would have to take it down after curing, so just in case the hempcrete did not support itself, I stapled some hession under the rafters first. A good move as it turned out.


It wasn't until we were all set up that I realised we didn't know the ratio of hemp, lime and water for the ceiling mix. I had the instructions for wall mix, but not the ceiling mix. Pity it was the weekend.

I reasoned that if the ceiling mix only used half the lime, then I would only need half the water. I reasoned wrong! It was pretty clear that the mix was too dry, so after a mild panic, we quickly tossed in an extra 1 1/2 litres. It seemed that the mix was holding together a bit better, so we placed it.

Sam worked the mixer, and Shelley helped move the tub of mix. First mix, first accident. The handles of the tub weren't strong enough and a tub load narrowly missed Shelley as it tipped out all over the floor.

Otherwise, everything went smoothly and we mixed 2 1/3 bales of hemp. It's now over a week since the hempcrete was placed, Wayne didn't make it to finish the box gutter, so I checked it out. It's a bit friable on top, but it has bound together somewhat. The big test will be when I try to remove the formwork below, but that won't be for some time yet. Meanwhile, I hope the plastic will keep tonight's rain off our first attempt.

Planning the electrical set out

Sometimes it just isn't enough to plan things out in your mind. You have to see it to figure out the problems. So it was for our electrical set out. We are using wall boxes to create a cavity behind the power points and light switches and conduits for the wiring. Hempcrete and wiring don't mix, so these measures keep them apart.

After Brendan the electrician installed nearly all the points in the extension, I noticed a troubling detail. The knock out in the wall box where the conduit enters the top was less than 10mm from the front face of the wall box. With the 25mm conduit on the inside of the frame and only 50mm of hempcrete cover on the inside, that would leave 25mm down to 7mm cover on the conduit. The risk of a crack along the line of the conduit looked too great.

Nothing for it but to relocate all the conduit to the outside of the frame and bring the wire into the back of the wall box through the noggin. Most of the positions worked out well, with a few tricky spots to work out with Brendan tomorrow.


All the conduits had been fitted with steel saddles. We could have painted them with Ormonoid, but it just seemed like hard work. Luckily I noticed plastic brackets on a trip to Bunnings, so I replaced them all as I relocated the conduits.


We nearly forgot the electric highlight windows. Hopefully we've got everything covered now. I don't want to think about gouging out to add an extra conduit after the hempcrete walls are built.

Unexpected costs

Although I don't generally post bloody wounds on my blog I thought I should let you know about the risks of having a worksite at home and having dogs in the backyard. I came home one afternoon in August to find this gaping wound on Toffee's leg. A quick bit of day surgery and many 100's of dollars later and she was as good as new. Then just last week, Mum and David were over with Molly and she scraped her belly on a bit of box guttering while chasing flies. Thankfully she didn't need to have an anaesthetic and was stitched up with only a little help...3 of us firmly holding her as the vet placed a couple of quick stitches on her side. 

The good news is that Toffee has completely recovered, Molly is also fine, she has a bucket head and we get to have a  few laughs at her expense.
yucky wound on poor Toffee

Molly's nasty wound